|
Inventor is a software made by autodesk that is used to model 3D objects. It can be used in many different applications. Often used to be 3D printed or making components for parts for machines.
|
Making the "M" shape in inventor.
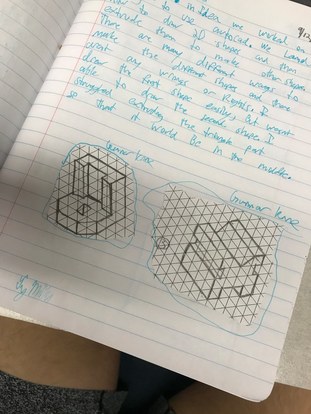
Step 0. I drew up all the sketches on the grid
paper so that it would be easier to make them
later in inventor.
paper so that it would be easier to make them
later in inventor.
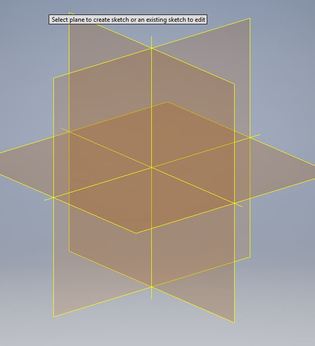
Step 1. Select which plane to use for the part. For this
part we will be using the XY plane as it is the two
dimensional plane.
part we will be using the XY plane as it is the two
dimensional plane.
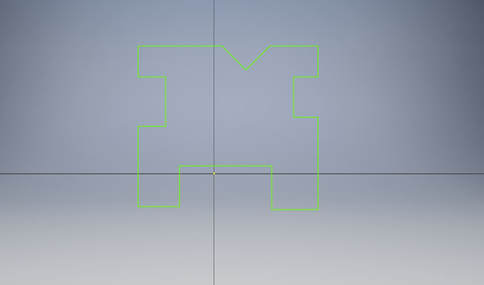
Step 2. For step two we will be drawing out a rough draft
of what the front of the shape will look like. There are multiple
ways to do this, line tool or the cube. But I chose to do the line
method. Finish drawing out the M Shape.
of what the front of the shape will look like. There are multiple
ways to do this, line tool or the cube. But I chose to do the line
method. Finish drawing out the M Shape.
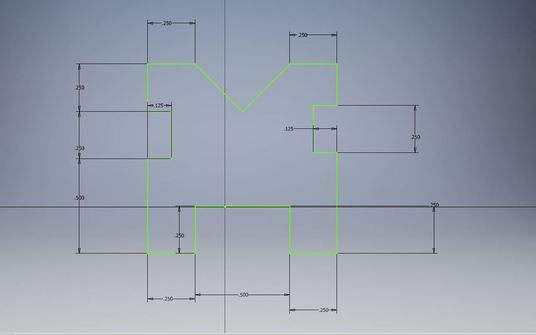
Step 3. In step 3 we will be dimensioning out the shape. The height and
width should always add up to 1. On the bottom use two .25s and in
between them it should be .5. Then on the sides start with a .5 then two .25s.
The two parts that go in should go .125 inches into the shape. Then
on either side of the V it should be .25 inches.
width should always add up to 1. On the bottom use two .25s and in
between them it should be .5. Then on the sides start with a .5 then two .25s.
The two parts that go in should go .125 inches into the shape. Then
on either side of the V it should be .25 inches.
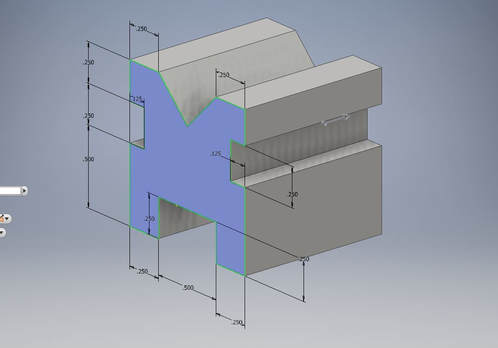
Step 4. Step four is just extruding the shape. So click finish shape.
Then click "Extrude" in the top left. Make the extrusion 1 inch long.
It doesn't matter on this shape what direction the extrusion is in. Then
finish and save and you are done.
Then click "Extrude" in the top left. Make the extrusion 1 inch long.
It doesn't matter on this shape what direction the extrusion is in. Then
finish and save and you are done.
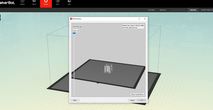
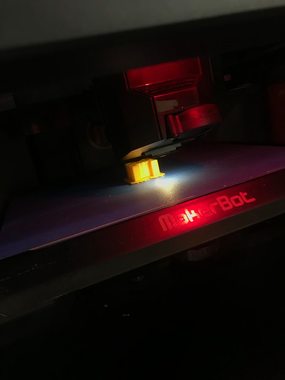
Step 5. We set the print up in maker bot. It was important to center the project and make sure to make the size %1000
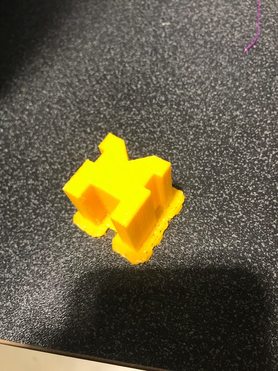
I made my piece out of yellow filament. After it was done printing I broke the support piece off. And im done. :)
|
|
What I learned during the inventor phase of IDEA class. I learned how to start by choosing a plane, and then make the shape by either drawing it out free hand and dimension or starting with a square and deleting using other shapes. I also learned how to extrude and how to use maker bot software and the maker bot 3D printers.
